
A rack drawn as a box on a floor plan tells the technician where it is, not what goes in it. The questions come up on site instead: is there a free U for the new switch, which port is camera 3 on, will the UPS hold the PoE switch and the recorder? Strucit’s rack designer answers them in the same project as the floor plan, before anyone gets in the van.
Put the rack on the plan
The Rack tool (shortcut r, in IT Infra) places a rack where it will stand. It can be wall-mounted or floor-standing, from 3 to 44U in the presets or any height from 1 to 52U, with 19″ or 10″ mini rails, a depth, a front door and a fan kit. The room is filled in from where the rack stands on the plan.
The switches, servers, firewalls, modems, recorders and UPS you already placed don’t need drawing again. Move into rack › in a device’s menu lists the plan’s racks with their free U. The device keeps its name, specs and cables, which now end at the rack. Unmount puts it back on the plan.
Place the gear U by U
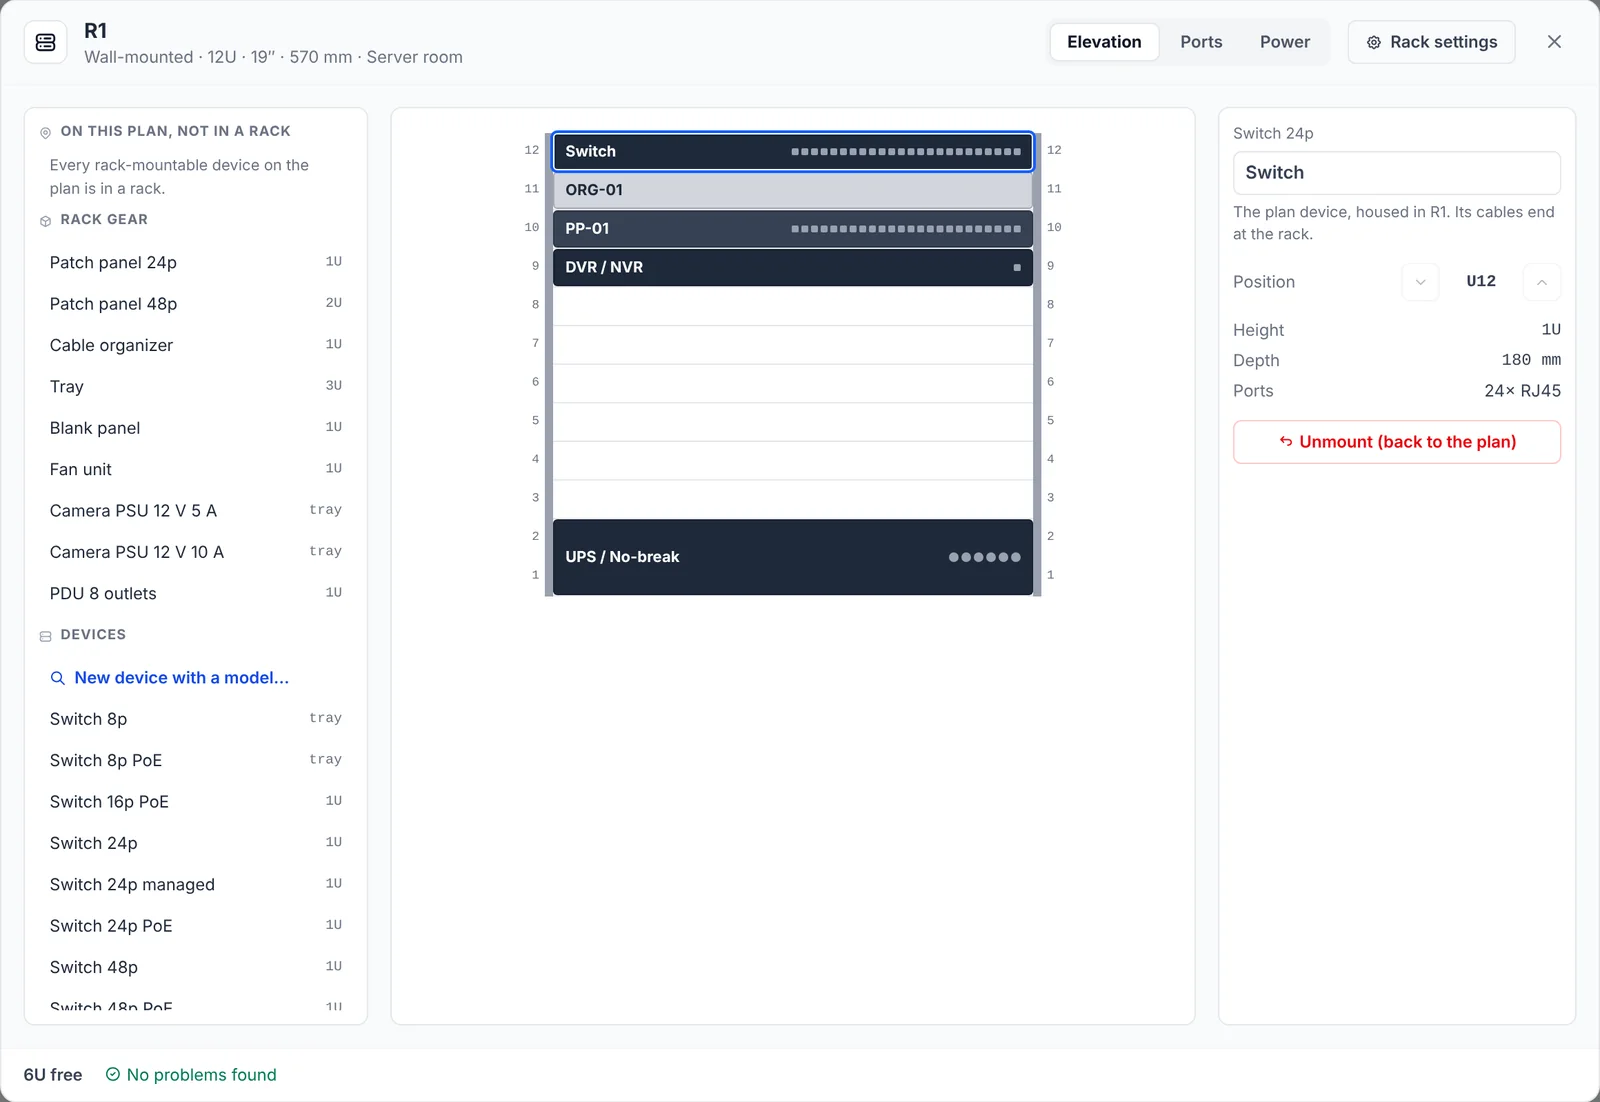
Open rack shows the front view at scale, U1 at the bottom. Click an item in the catalog on the left to put it at the first free U, or drag it where you want it: a green ghost says “U10 · fits”, a red one names what it overlaps. Patch panels, organizers, trays, PDUs, blank panels and fan units are in the catalog too.
The designer checks as you go:
- Overlaps and items outside the rack.
- Items deeper than the rack.
- A UPS above the bottom third, where its weight shouldn’t be.
- A patch panel or switch with no cable organizer next to it.
A device set to a real model from the device catalog takes its height, ports, depth and power draw from the datasheet. You can also add a new modelled device straight from the rack: each model shows its size to scale and whether it fits.
Map every port
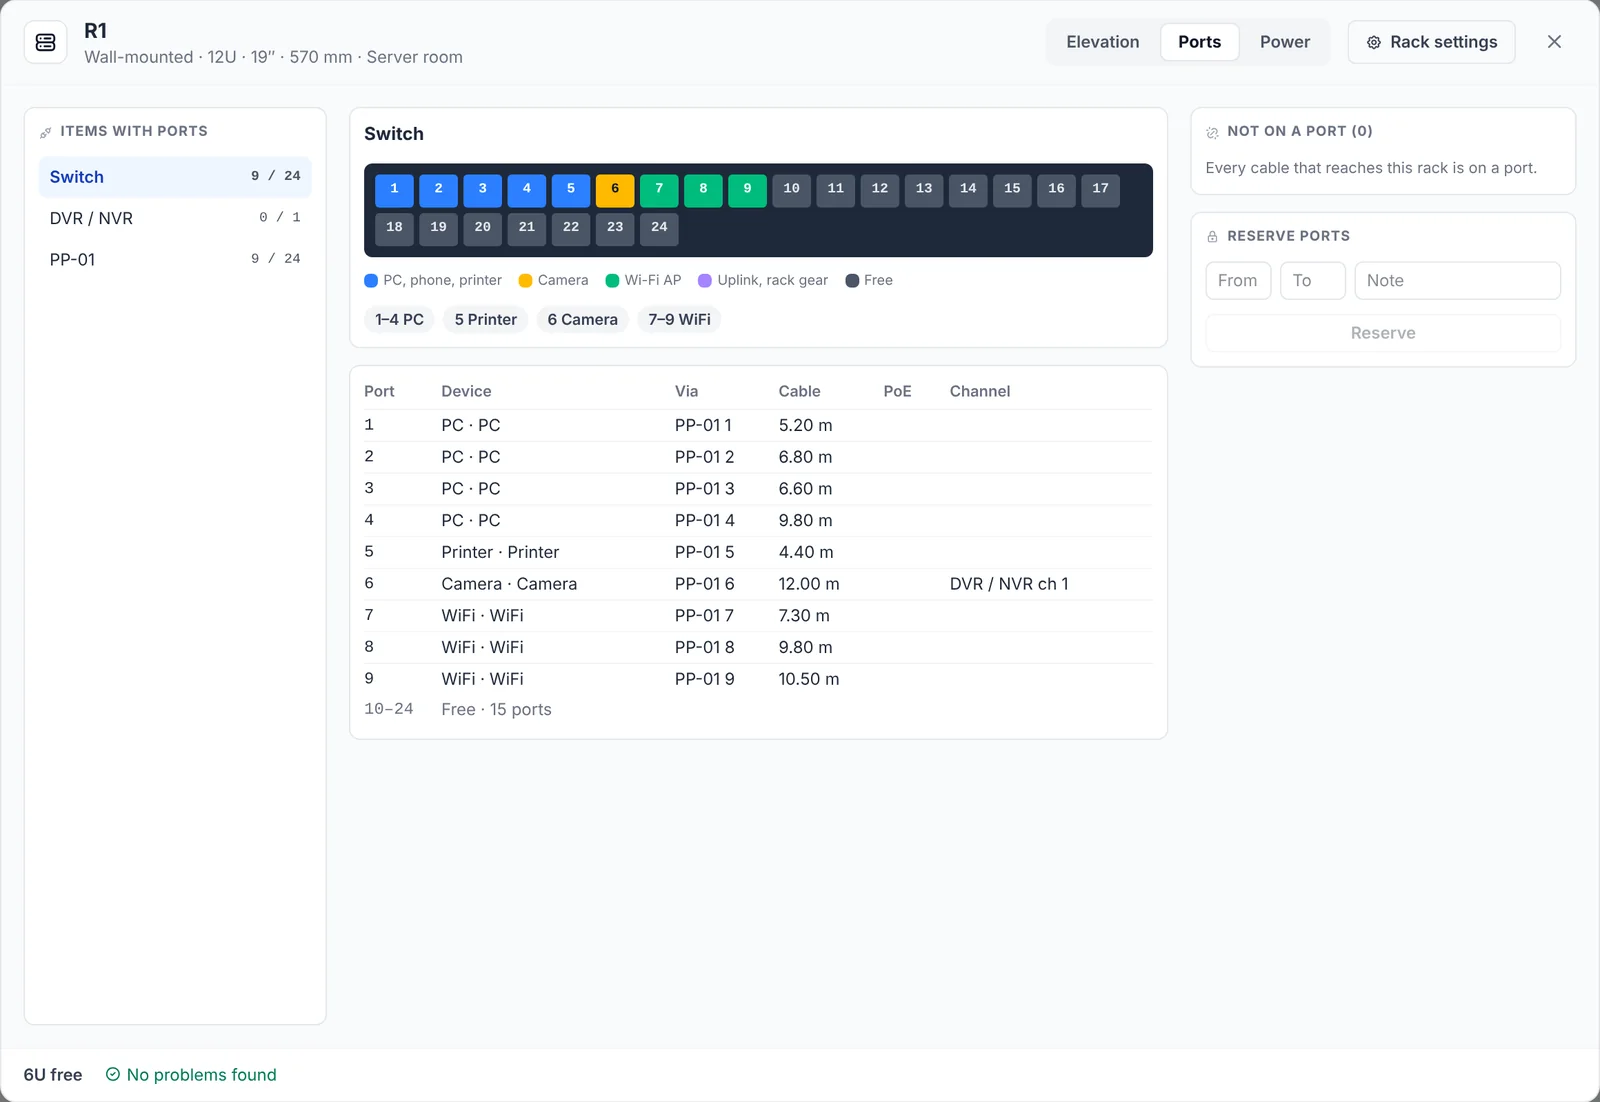
The Ports tab draws a faceplate for each item, every port coloured by what is on it: PCs, phones and printers, cameras, access points, uplinks, free. Below it, the port table lists each port’s device, the patch panel port it comes through, the cable type and length, and the PoE watts. Each far device is named with its room and floor, as in “CAM 1 · Reception · Ground”, even through a riser to another floor.
- Not on a port lists the plan’s cables that end at the rack. Drag one onto a port, or let Auto-assign spread them: each device type together, through the patch panel at the same port number.
- Reserve ports keeps a range free for later, with a note.
- Recorder channels. IP cameras get an NVR channel from the PoE port they are on, or the next free one, and you can set it by hand. An NVR with more cameras than channels turns red. Analog cameras on coax land on a DVR’s BNC inputs.
Check the PoE budget
Each switch and PoE NVR shows what its devices draw against its budget: “PoE budget 49 of 384 W”. The draw is the device model’s own where one is set, otherwise a default for the device type, so a plan with real models gives a real figure. A patch panel port that PoE passes through says so, with its watts.
The cabling report’s switch suggestion sizes a switch by ports; this is where you see whether its PoE budget holds.
Check the UPS load
The Power tab draws the tree from the wall outlet through each UPS and PDU to everything plugged in, each with its estimated draw. Per source you see the load in watts against its rating, and the outlets in use. A UPS set to a catalog model is measured against its own rating. The checks flag:
- A source over its rating.
- A UPS over 80% of its rating.
- Anything not plugged in.
- A PoE switch or NVR not on a UPS, since the cameras and access points it feeds go down with it.
Hand it over
The text report gets a RACKS section with each rack’s specs, its contents U by U, a port map per item, the cameras with their port and channel, and the cables not on a port. A switch in a rack reads “(in R1, U14)”. The PDF has the same as section 1.8 Racks, with a drawing of the front view. On a phone, the rack opens as a full-screen sheet with the same tabs.
Limits worth knowing
- No rear view. The front view is a schematic for the technician, not a picture of the devices.
- Estimates. Power and PoE figures come from each model’s datasheet or from defaults based on common models. Check them before buying a UPS.
- Patch cords are listed, not sized.
- No weight or load rating, and no 0U vertical PDUs or side-mounted gear.
Free and Pro
The rack designer is free on every plan: racks, the front view, the Ports and Power tabs and the RACKS section of the text report. The 1.8 Racks section comes with the PDF export, which is Pro. More on the rack designer page.
Next rack you install, plan it in Strucit first: press r, place the rack and move your switch into it.